"Pi Car" Remote Control Robot
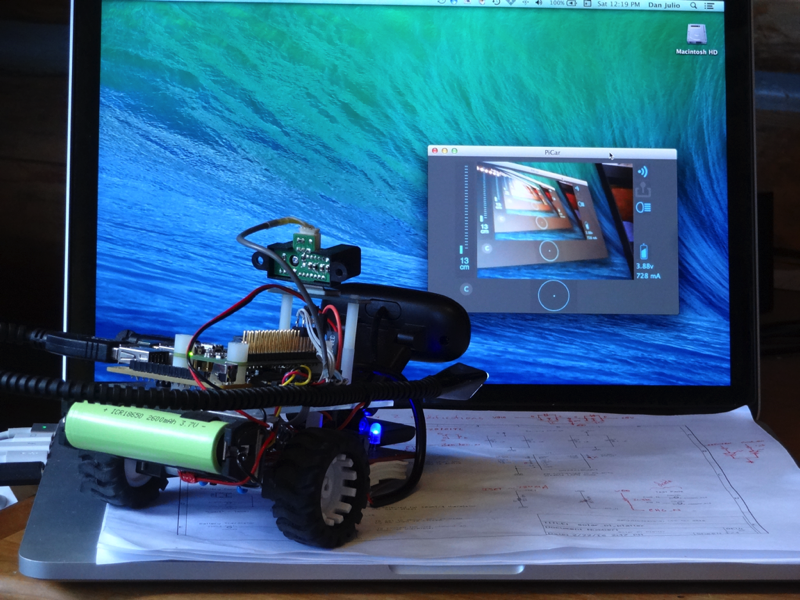
Self-portrait
The Pi Car was built on an old Sparkfun Ardubot base as an example project for the kickstarter campaign. This project probably isn't useful "as-is" but perhaps the information shared here might be useful in other projects.
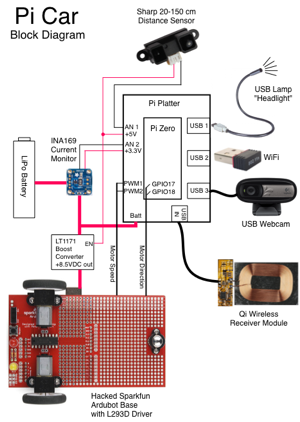
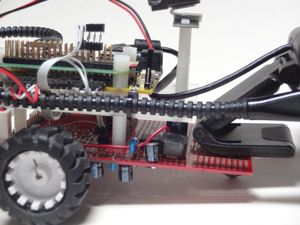
The Pi Car was built with a first revision Pi Platter on an old Sparkfun Ardubot base. The Ardubot was designed to be controlled by an Arduino with only forward/reverse control at a fixed speed but contains a prototyping area. It uses a L293D driver with the Enable input tied high. I modified the board so the Solar Pi Platter PWM signals drove the Enable input for speed control. A pair of NPN transistor inverters allowed Pi GPIO signals to control motor direction. The high PWM frequency is used for smooth motor control.
A LT1171 boost converter is used to step up the battery voltage to approximately 8.5 volts to provide power for the motors.
A Logitech USB camera coupled with mjpg-streamer handles up to 15 fps at 320x240 pixels for reasonable video streaming. mjpg-streamer setup is not described here but is fairly straight forward.
A Sharp distance sensor is mounted above the camera and connected to a Solar Pi Platter analog input with Vref set to 4.096 volts. A table in the control software maps the ADC value to distance.
A USB reading lamp makes the perfect steampunk headlight and can be turned on and off using the Pi Platter’s per-port USB power switching.
An inexpensive INA169-based current sensor in series between the battery and the rest of the system and wired to the Pi Platter’s other analog input gives current draw. The Pi Car idles at around 700 mA from a charged battery and can pull upwards of 1500-2000 mA when the motors are running and loaded.
Finally a Qi receiver module connects to the Pi Platter’s USB power input for wireless charging.
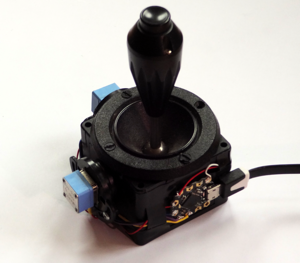
An old analog joystick (2 10-kohm pots and a button) is connected to an Arduino Leonardo (DF Robot beetle) running a simple sketch that reports joystick and button information over a USB Serial link.
Three pieces of software comprise the entire system.
Motor Control
The Pi Car was built with a first revision Pi Platter on an old Sparkfun Ardubot base. The Ardubot was designed to be controlled by an Arduino with only forward/reverse control at a fixed speed but contains a prototyping area. It uses a L293D driver with the Enable input tied high. I modified the board so the Solar Pi Platter PWM signals drove the Enable input for speed control. A pair of NPN transistor inverters allowed Pi GPIO signals to control motor direction. The high PWM frequency is used for smooth motor control.
A LT1171 boost converter is used to step up the battery voltage to approximately 8.5 volts to provide power for the motors.
Video
A Logitech USB camera coupled with mjpg-streamer handles up to 15 fps at 320x240 pixels for reasonable video streaming. mjpg-streamer setup is not described here but is fairly straight forward.
A Sharp distance sensor is mounted above the camera and connected to a Solar Pi Platter analog input with Vref set to 4.096 volts. A table in the control software maps the ADC value to distance.
Other peripherals
A USB reading lamp makes the perfect steampunk headlight and can be turned on and off using the Pi Platter’s per-port USB power switching.
An inexpensive INA169-based current sensor in series between the battery and the rest of the system and wired to the Pi Platter’s other analog input gives current draw. The Pi Car idles at around 700 mA from a charged battery and can pull upwards of 1500-2000 mA when the motors are running and loaded.
Finally a Qi receiver module connects to the Pi Platter’s USB power input for wireless charging.
Joystick control
An old analog joystick (2 10-kohm pots and a button) is connected to an Arduino Leonardo (DF Robot beetle) running a simple sketch that reports joystick and button information over a USB Serial link.
Software
Three pieces of software comprise the entire system.
- pi_car.c - This is the software running on the Raspberry Pi. It uses a single TCP port for communication with the control software running on the control computer. It requires Wiring Pi to be installed (for access to the GPIO pins).
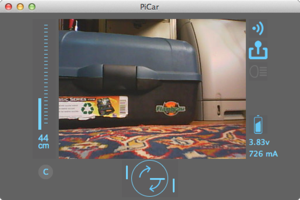
- pi_car_tv - A xojo project that implements the main control program running on the control computer. This project may be compiled for Windows, Mac OS X or Linux.
- read_joystick.ino - The arduino sketch reading the joystick.
All software can be found at the GitHub Repository.
